Getting Started With FASTAI
Lesson 1 Learnings
Here is what I learnt from lesson 1 of the FastAI course.
In Deep learning you start with a random neural net, feed it examples and it learns to recognise things. The model creates the layers for itself and the deeper you get the more sophiticated the features get. Hence, there is no need to hand code the features as you may do in Machine Learning. This means that recognition we never thought was possible by machines is now easier than ever!
In this lesson, Dr Jeremy Howard demonstrates a ‘simple’ image based recogniser. He mentions that this recogniser doesn’t have to be your general pictures, and can be applied to images of sound waveforms and mouse movements, as well as other time series data forms, to create classification models using the visual learner model.
For the vast majority of applications, such deep learning does not need lots of data and can be applied to real world projects very simply. FastAI enables state of the art work for FREE.
FastAI is build on top of pytorch, which is easier than you think since pytorch was developed to build things on top of it. Pytorch does require lots of more complex code to implement some easy things. This library reduces the amount of code required, making it easier to get started and ensures there are less things that could possibly go wrong. Pytorch dominates tensorflow in the field in machine learning, as tensorflow is becoming the minority in papers as it loses it’s popularity.
This lesson also introduces Jupyter notebooks for beginners, and demonstrates how Jupyter can even be used as a way to present slides with python cell execution during the presentation (using RISE extension). Jupyter allows us to view data at every step along the way.
Jeremy then goes into how the fastai library operates. Datablocks are the most important as they are the way to get all data into the model. This also helps make all the images the same size since we don’t need HUGE images to train the model. Splitters are used to split the data, setting some aside for validation/testing. A learner is then used to combine the model and the data and Jeremy mentions timm integrated models that can be used with fastai. Here there is lots of information about the different models accessable within the library. Pretrained models make the weights availiable to download and you start with a network that already does a lot. finetune() takes the weight of the classified images and teaches the model the differences between the validation set and the original training set. After the model has been trained, you can deploy the model with .predict() to make classifications.
What about other models? This lesson uses a computer vision model but deep learning is not just about recognition and classification of images. FastAI is also capable of other methods such as segmentation and income prediction - using the tabular_learner. Using such a technique can be done with fit_one_cycle(), rather than finetune(), since tabular data is always different and we can’t just apply a pretrained model.
Also mentioned in this lesson is collaborative filtersing where it trains a little lower and higher of maximum and minimum points. The valid_loss column in the training table shows the Mean Squared Error (MSE) of the model. learn.show_results() shows the rating and predicted rating of the model.
My own Classifier
Following the lesson I created my own image classifier that can classify 10 different animals:
- Kangaroo
- Wombat
- Koala
- Echidna
- Cow
- Emu
- Crocodile
- Camel
- Dingo
- Whale
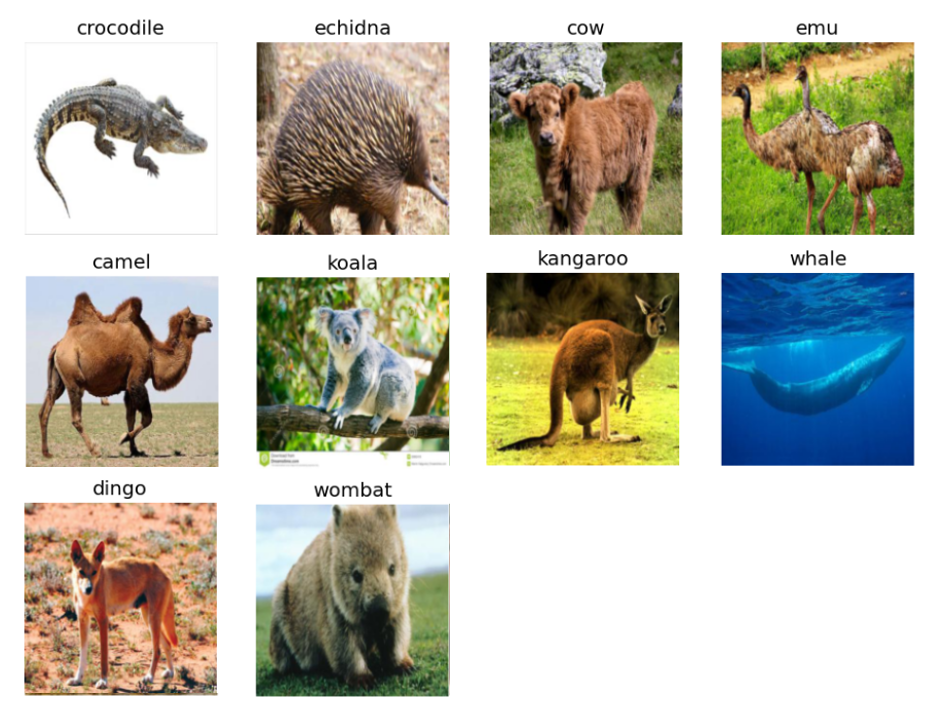
I downloaded 200 photos of each of these animals and put them into a Datablock. An example of the images in this Datablock with all of the animals is shown here:

I then trained the model using the resnet18 model and got the following metrics:
| epoch | train_loss | valid_loss | accuracy | time |
|---|---|---|---|---|
| 0 | 1.601801 | 0.305443 | 0.891599 | 03:58 |
| 0 | 0.258245 | 0.245349 | 0.924119 | 05:35 |
| 1 | 0.148649 | 0.217734 | 0.940379 | 05:33 |
| 2 | 0.097789 | 0.227810 | 0.940379 | 05:35 |
This shows, that from a few simple lines of code, I could create a model to predict these classes of animals with 94% accuracy!
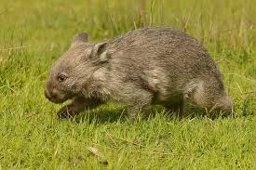
I then tried the model out on a random image from google that I have here:

The results from learn.predict() are shown here:

Thank-you for Reading!
This is a loonnnng post, but this first lesson is a great introduction to Deep Learning and what it’s all about!